Adding New Products
Adding new products is simple and can be done in under a minute. However our back office also provides you with powerful functions and options, that are optional, when creating your products. Explore and leverage on some of these options to create a more efficient work environment for your business.
Follow the steps below to create a new product:
1. After you have logged in to your back office, click on “Product" category on the left side menu
2. Next, click on the “Product Information" sub-category
3. Click on “New" to create a new product
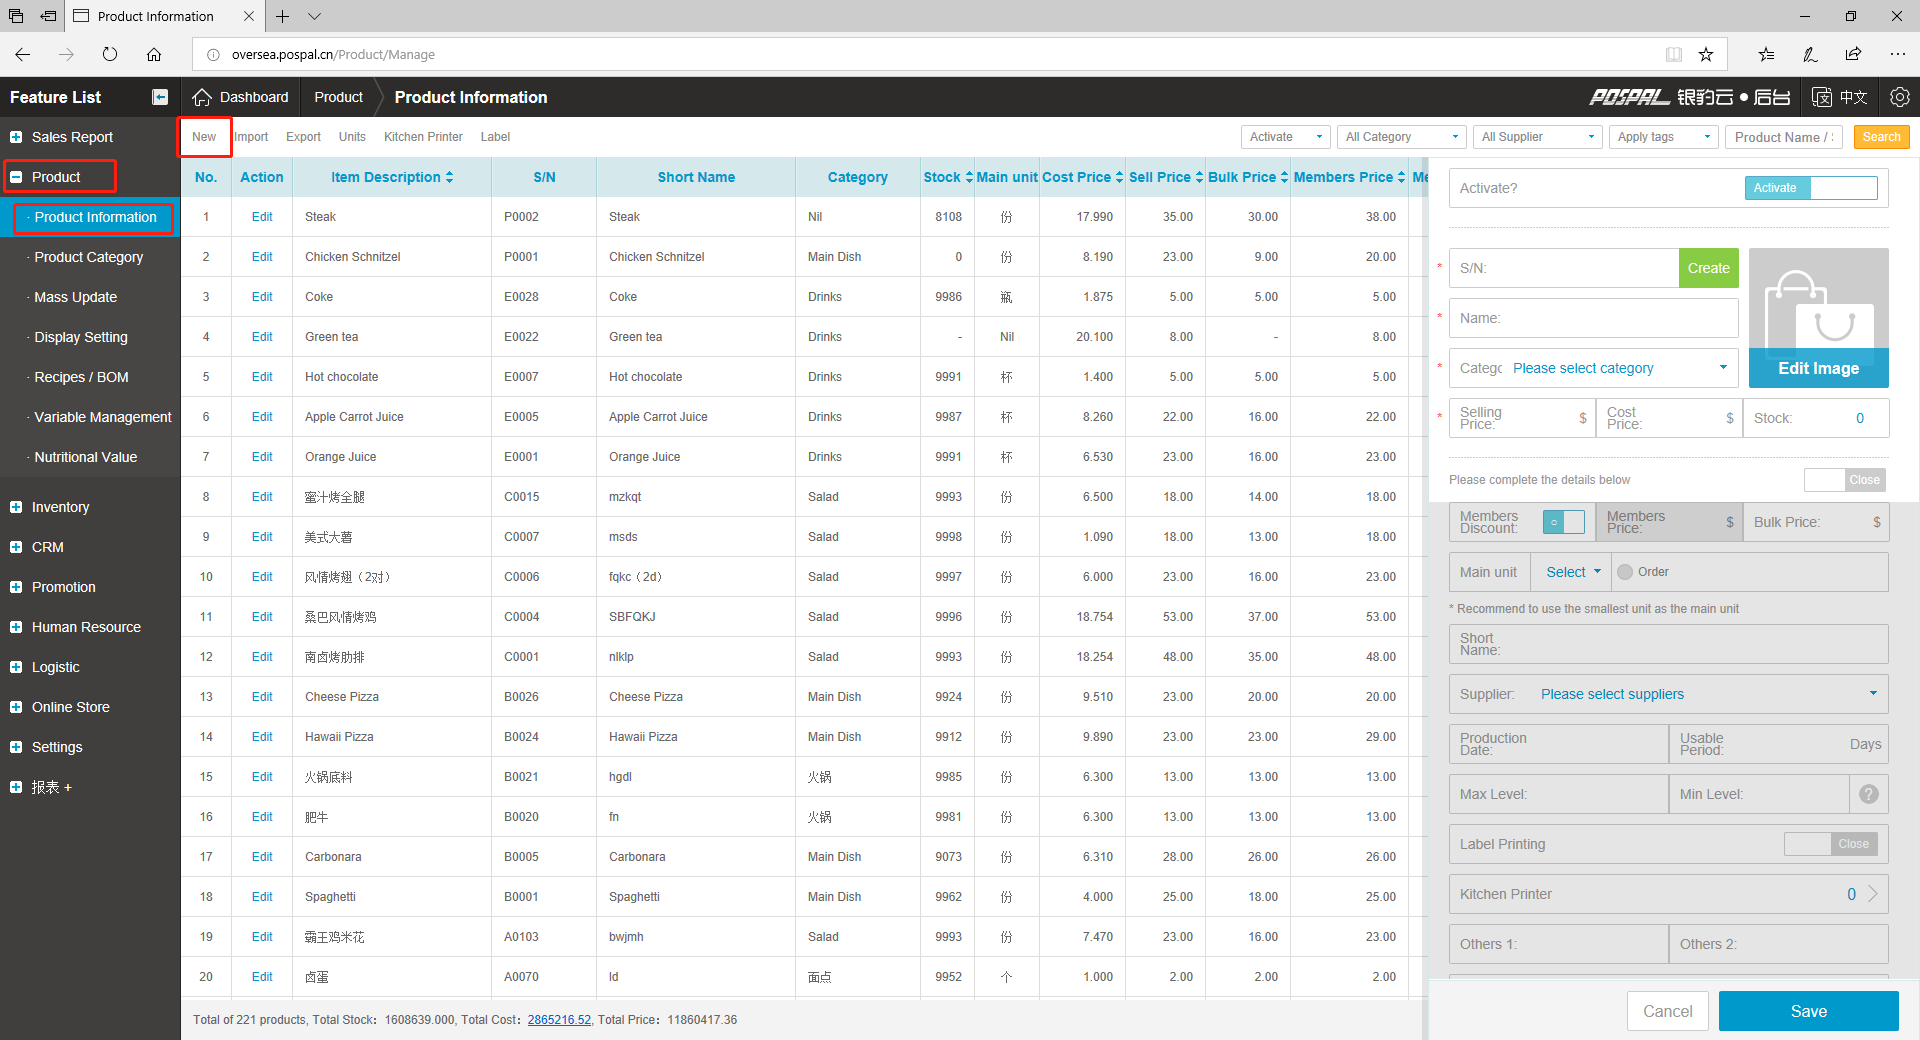
4. Enter the compulsory information:
- Product S/N (barcode), click on “Create" if product does not come with a barcode to generate a random S/N
- Product Name
- Product Category
- Selling Price
- Cost Price (if not applicable, simply enter “0")
- Stock (if not applicable, simply enter “0")
5. Click on “close” switch to enable optional settings/information settings
6. Enter the optional information:
- Member discount eligibility (click on the switch to toggle it, blue = enabled, grey = disabled)
- Member price (item sold to member will be fixed to the preset member price, not inclusive of any taxes)
- Bulk Price (for wholesale mode)
- Unit of measurement (UOM) for the item (click on “Edit" to add new UOM)
- Click on “Order" if you intend to use the UOM as the order unit (blue tick=yes, grey circle=no))
- Short name of the product, used for quick search on the front office
- Suppliers (suppliers have to be added from the back office first)
- Production date of the product
- Usable period of the product
- Max level of stock (used to trigger an inventory warning once stock level exceeds max level)
- Minimum level of stock (used to trigger an inventory warning once stock level falls below the minimum level)
- Label Printer (click on the switch to toggle it, blue = enabled, grey = disabled)
- Product Remarks (if any)
7. Once done click on “Save”